BOXGAME 2.0
Unity · C# · Gameplay Prototype · Procedural Animation · 2025
ABOUT
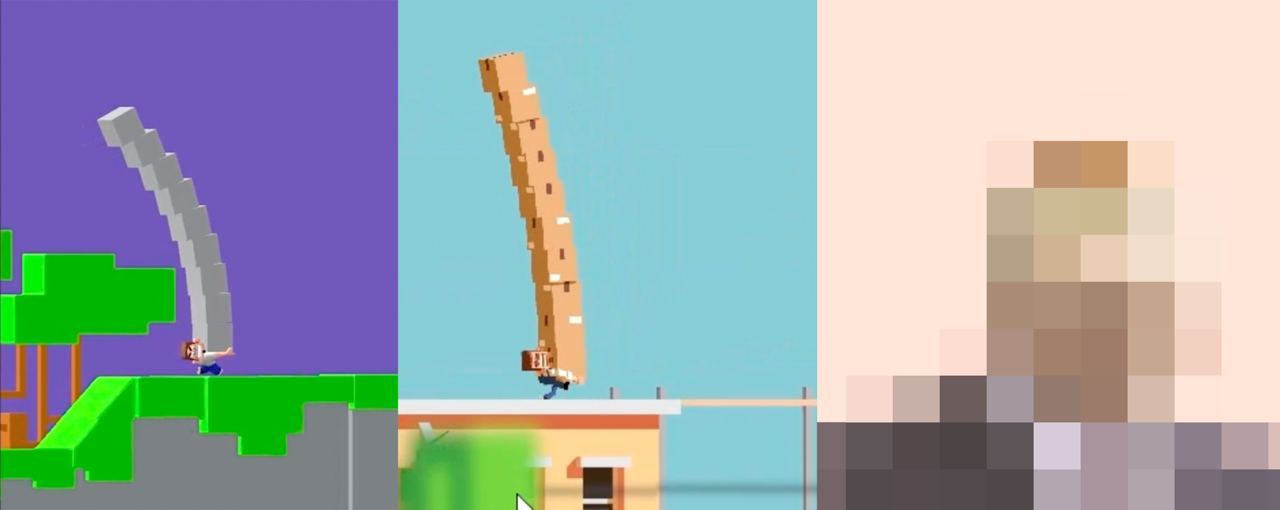
After the first BoxGame balance prototype, I came back to the idea and started rebuilding the core mechanic. This version is less about moving left or right and more about teaching a small character how to move with intent.
I also refreshed the visual direction, keeping the readable box-like silhouette while making the character feel cleaner and more playful on screen.
01 — BEZIER LEVELS
At first, levels were built from separate pieces placed one after another. Each piece had a connection point, and a simple method spawned the next piece at the end of the previous one.
Every piece also needed its own collider. Since the generated mesh colliders were unreliable, I made simpler collider meshes by hand. Sloped sections also needed manually adjusted triggers for speed and balance.
This made every level section slow to build and test. The character could also break while moving between pieces, so the system would become harder to maintain as the level grew.
Bezier splines solved those problems more elegantly. Character movement becomes motion between two sampled positions. The height difference between those positions gives me the surface slope, and the same points can generate a mesh, which makes level creation much faster.
A single polygon is two triangles connected by two shared vertices. In this case, the spline is just an array of points in space. I had the idea to duplicate all existing points and simply move the copies downward. Once the upper and lower points are connected, they form the 3D model I need.
The light blue line marks the original sequence of points in space, where the first point is at zero coordinates in this example. The dark blue line marks the exact same sequence, shifted downward by h.
Vertices 2 and 1 are shared by triangles (012) and (231), just as vertices 4 and 3 are shared by triangles (234) and (453), and so on. The vertex count for every two triangles still remains 6, but some vertices with different indexes store the same position.
I remembered it with a strange public-transport analogy: the number of passengers does not change just because someone sits on somebody else's lap. Everyone still needs a ticket. Weird, but it helped me not get lost in the mesh logic later.
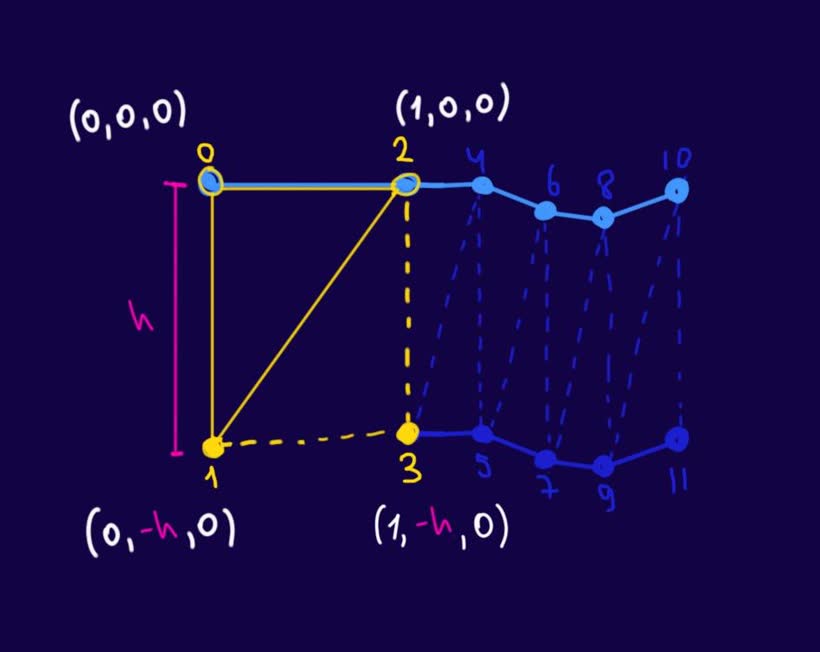
I create a vertex array that is twice as large as the number of points in the spline. While looping through it, every odd-indexed element is shifted downward to the needed position.
01private Vector3[] GetVertices(VertexPath path, Vector3 groundHeight)02{03 var vertices = new Vector3[path.localPoints.Length * 2];0405 for (int i = 0; i < vertices.Length; i++)06 {07 var pointIndex = i / 2;08 var point = path.GetPoint(pointIndex);0910 vertices[i] = i % 2 == 0 ? point : point - groundHeight;11 }1213 return vertices;14}Then comes the part where it is important not to get lost. For each segment of six triangle indexes, I need to choose the right vertex indexes so the two triangles connect through the correct shared points.
01private int[] GetTriangles(VertexPath path)02{03 var numQuads = path.localPoints.Length - 1;04 var triangles = new int[numQuads * 6];0506 for (int i = 0; i < numQuads; i++)07 {08 var startIndex = i * 6;09 var vertexIndex = i * 2;1011 triangles[startIndex] = vertexIndex + 2;12 triangles[startIndex + 1] = vertexIndex + 1;13 triangles[startIndex + 2] = vertexIndex;1415 triangles[startIndex + 3] = vertexIndex + 2;16 triangles[startIndex + 4] = vertexIndex + 3;17 triangles[startIndex + 5] = vertexIndex + 1;18 }1920 return triangles;21}These two methods are already enough to generate a simple mesh: put the vertices and triangles into a Unity Mesh, recalculate the normals, and attach it to a new ground object.
01public LevelMeshGenerator(VertexPath pathCreator, LevelData data)02{03 _mesh = GenerateMesh(pathCreator, data.GroundMaterial, data.GroundHeight);04}0506private GameObject GenerateMesh(VertexPath path, Material material, Vector3 groundHeight)07{08 var mesh = new Mesh09 {10 vertices = GetVertices(path, groundHeight),11 triangles = GetTriangles(path)12 };1314 mesh.RecalculateNormals();1516 var meshObject = new GameObject("Ground");17 meshObject.AddComponent<MeshFilter>().mesh = mesh;18 meshObject.AddComponent<MeshRenderer>().material = material;1920 return meshObject;21}02 — PROCEDURAL WALK
First, I reworked the core movement system. The character no longer simply walks left or right; this time, I am teaching him how to walk.
With the new movement setup, I can control the character's position and tilt, and place the feet directly without raycasts or extra ground checks.
After setting up IK on the bones, the result started to feel surprisingly fun. The full-body behavior still needs more work, but this stage already has the feeling I wanted.
03 — CHARACTER MOVEMENT
I started working through the character movement more carefully. For this project, I did not use third-party animation tools like Spine. Everything here is a 3D model with a custom skeleton, IK components, and Tween.
After the first pass, I got a fully procedural animation that also takes the surface tilt into account. The character can adjust his body and feet to the ground instead of playing a fixed walk cycle.
04 — SLOPE MOVEMENT
I also worked on the mechanic for climbing small slopes. The surface angle now affects the movement speed, so going uphill feels heavier and more connected to the ground.
05 — CAMERA LOOKAHEAD
The base for the new version of the game was ready. One thing that kept bothering me was the camera behavior: when the character approaches a steep section or a drop, the player needs to see what is coming next.
I spent a while figuring out how to make the camera shift downward before the character reaches the slope. The solution turned out to be simple: the camera looks a small step ahead of the character. So if the path ahead goes down, the camera also moves down and opens the view.
06 — VISUAL EXPERIMENT
Next, I experimented with the visual direction. I felt like I would regret it if I did not try a few art options, so I gave myself room to test. I used 3ds Max and V-Ray to render realistic wooden details for the new assets.
The experiment worked, but I will not take this result into production. It is a nice and scalable way to create assets, yet the overall look feels too dated. The gameplay asks for something minimal, while this version adds more detail than the game really needs.
I also had to improve the mesh generator I described earlier. The platform the character runs on now has two UV channels: the first one for the main wood texture, and the second one for a lightmap that imitates the highlight on the upper embossing of the platform.
The goal was to make the lightmap follow the mesh shape, while the main texture projects over it without changing its form. I solved this by first creating a flat mesh from the X coordinates of the curve points. That gives me an even plane for the first UV projection.
Then I move the points by their Y coordinates to match the curve shape and project UV2 for the main texture. In the shader, I can then combine the texture and the lightmap cleanly.
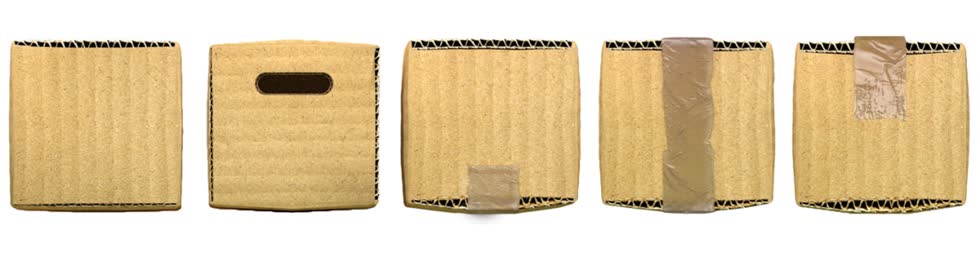
This is what the atlas for the lovely little boxes was supposed to look like.
07 — OUTLINE SHADERS
I looked for a way to imitate a hand-drawn outline on objects. I wanted to keep the elements geometric and simple, but still give them a bit of life.
I experimented with shaders and eventually got close to the result I had in mind.
Then I assembled everything with the current shaders.
08 — MESH EDITOR
The editor works. The mesh generator ignores the original control points and splits the result into separate objects. And, as you can see, the character still has no idea what is waiting ahead.
09 — CLIFFS
Next, I need to adjust the shader and randomize the point positions so the polygons do not form such an even checkerboard and instead create a more interesting shape. Even at this stage, I am already glad that the whole system works.
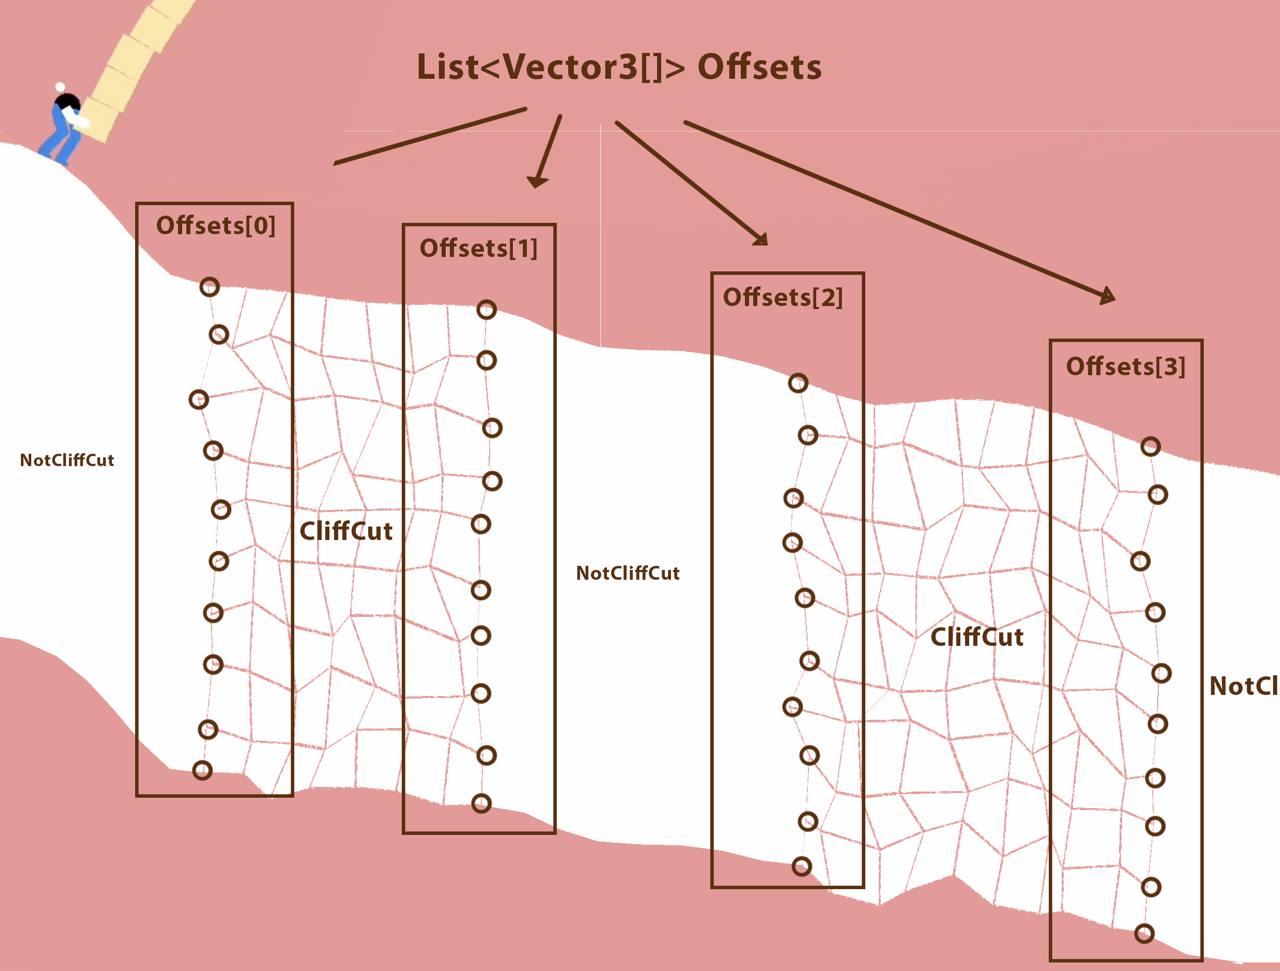
Some sections are generated as a single mesh (NotCliffCut), while others are generated from many separate meshes (CliffCut). Since these sections now have irregular edges, they all need to connect seamlessly. I could have kept the cliffs straight as before, but that result did not satisfy me.
This task almost stole my Christmas, but I eventually figured it out and cannot resist complaining about it a little. Feel free to skip the details if this part is not interesting.
All these objects follow one another and share a set of random offsets for every row, with each vector marked in the diagram. The challenge was passing the correct set of offsets to the left and right edges. The right edge of one mesh needs exactly the same vector set as the left edge of the next mesh, and so on.
Since the generator loops through all these meshes, I passed the two vector arrays as a tuple: the first tuple item belongs to one edge of the object, and the second belongs to the other.
01private void GenerateCliffMesh(02 Vector3[] points,03 int rows,04 (Vector3[], Vector3[]) sharedOffsets05)I experimented with collapsing cliffs and decided to revise some of their logic and animation. First, I needed to change how the mesh generator sorts its objects.
It is interesting to see how changing the traversal order of a two-dimensional array can produce completely different animations.
10 — CHARACTER DESIGN
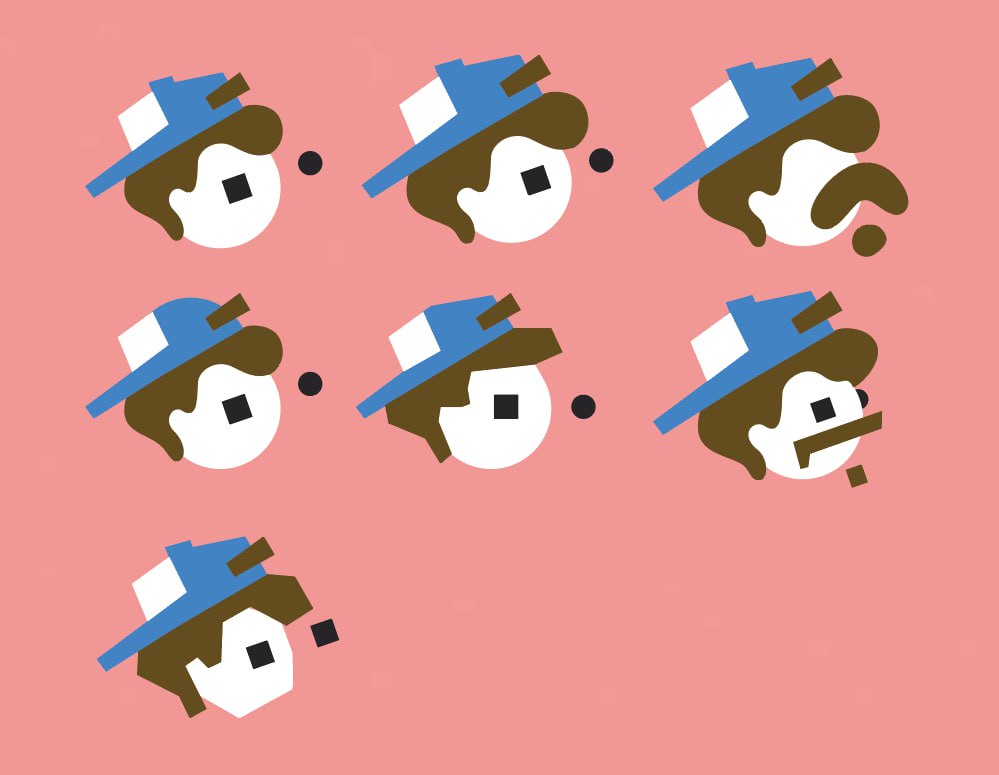
The main challenge is that you cannot simply draw an appealing character. The design has to fit naturally onto the existing technical foundation. The head needs to rotate cleanly, the arms need to bend in an expressive way, and the legs need to move correctly from one step to the next.
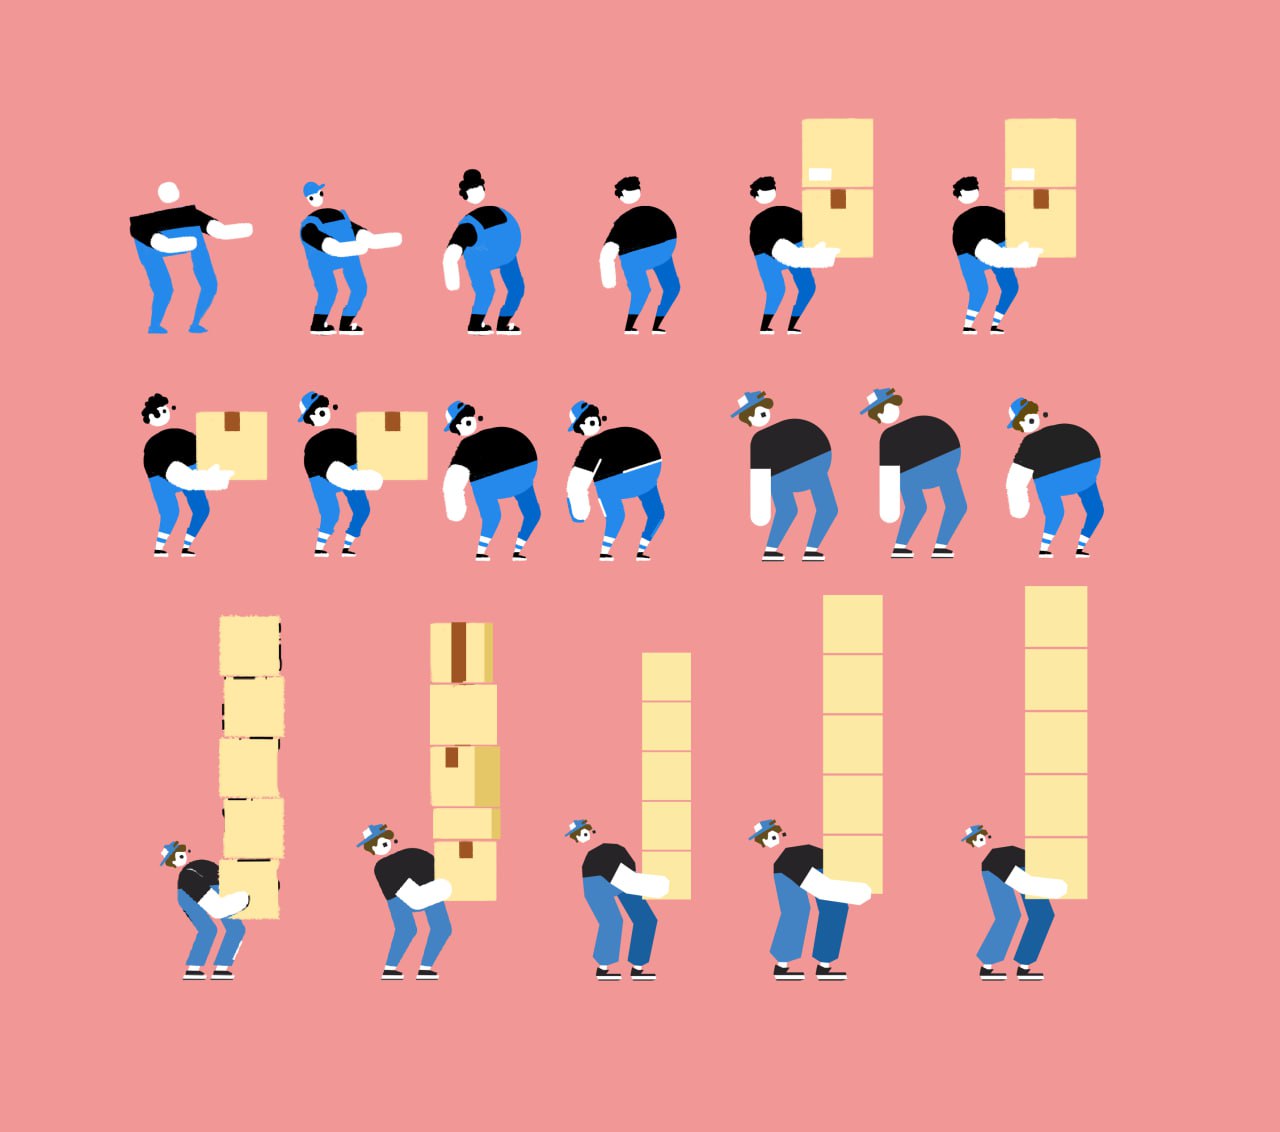
I first sketched the shape in Photoshop, then developed it more deliberately in Illustrator. After that, I adjusted the proportions in Blender, assembled the model in Unity, and returned to Blender several times to refine the skeleton and the length and shape of the limbs.
11 — LASER MECHANIC
I tested the laser mechanic and applied the new character design to the game.
I never expected drawing a readable laser against a light background to be this difficult.
12 — SLIPPERY SECTIONS
I worked on slippery sections so the player cannot maintain balance while the ground slides beneath them.
The fields receive random values at the start of each game. This creates sections with a unique shape. Almost unique.
13 — CONVEYOR BELT MECHANIC
I also worked on the conveyor belt mechanic: a moving surface that affects objects placed on it and changes the balance of the scene.
The goal was to make the motion readable at a glance. The player should understand that this is not just a decorative platform, but a surface with direction, force, and gameplay impact.